You can make use of the following formatting guidelines to customize your tour messages.
TABLE OF CONTENTS
Customize your messages
1. Go to Automated Message

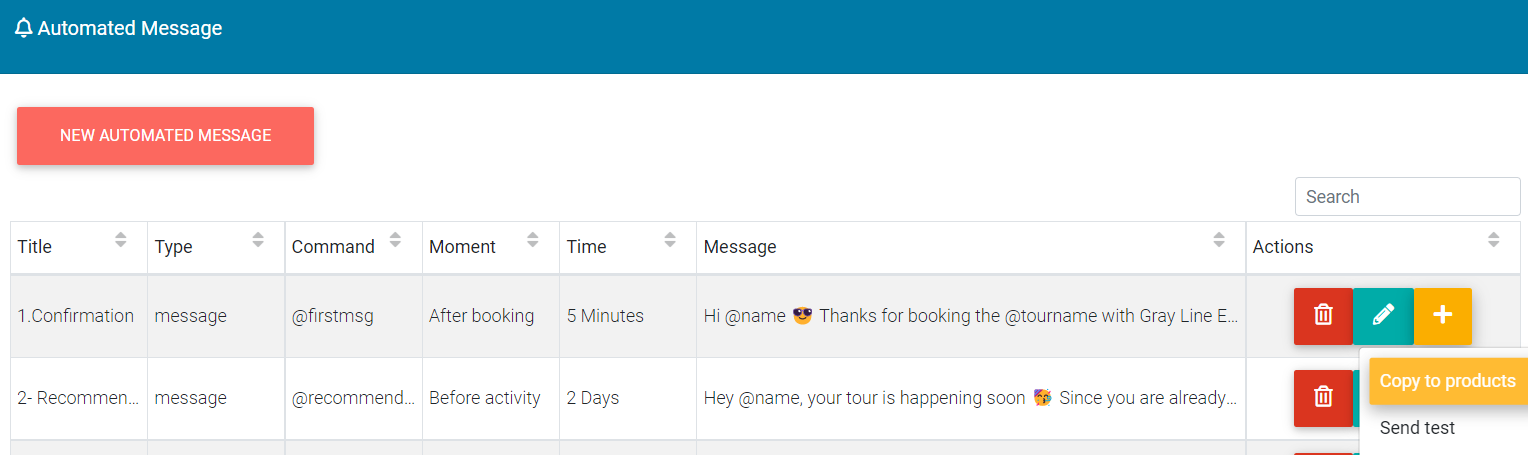
2. A dashboard with all your automated messages is going to appear, like this one:

3. Then click on the “Plus sign” yellow button and select the "Copy to products" option, in order to select the tours you want to add the message into:
4. Once you've selected the "Copy to products" option, this window will appear:
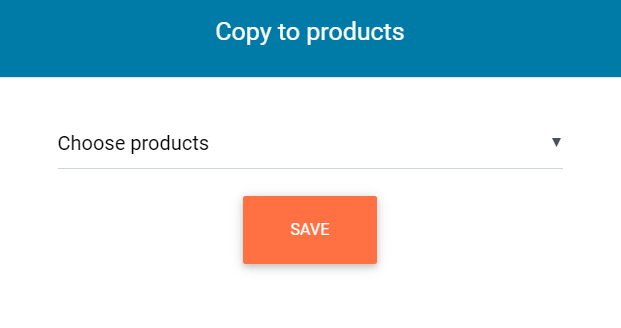
5. Select the arrow and scroll down to find the tour you want to add the automated message into. Select the tour box and then click on "Save":


6. Now, go to the main menu to Products:

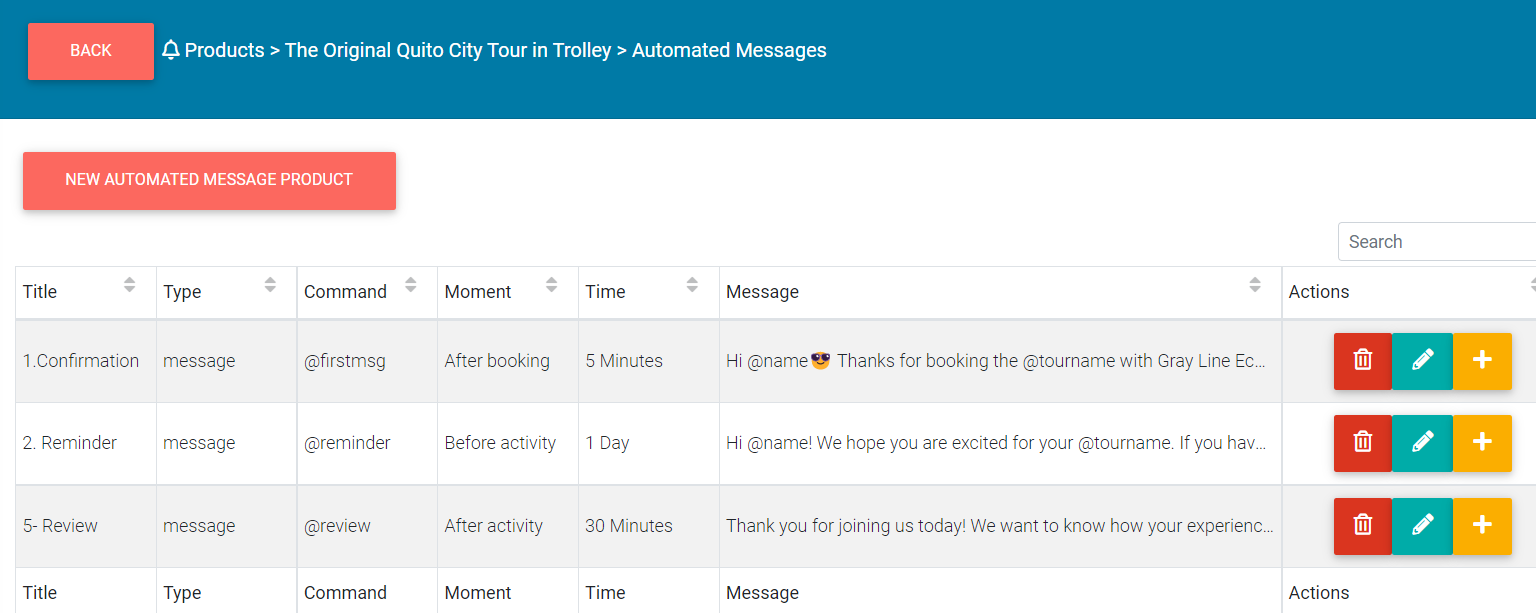
7. The dashboard with all your products is going to appear:

8. Select the Product you want to Customize the Automated message by clicking on the "Bell" button of the product:

9. The dashboard with all the automated messages the product has will appear like this:
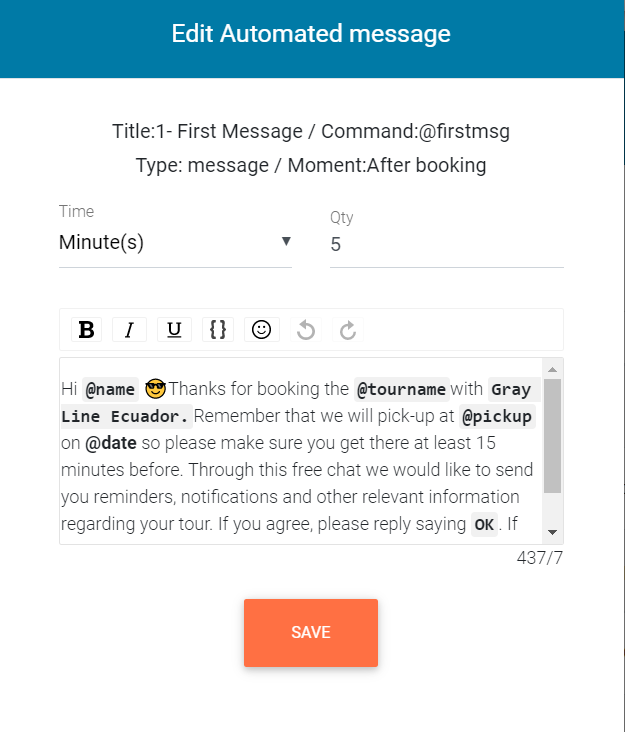
10. Select the message you want to customize by clicking on the "Pencil" button:

11. Once you've clicked on the "Pencil" button, this window will appear. In here, you can modify the amount of time in minutes, hours, or days when a message will be sent (but you won't be able to modify if the message is sent before or after; this is explained on the following link: https://touropp.freshdesk.com/support/solutions/articles/67000386225-how-to-edit-your-automated-messages
However, this is the place where you can customize your automated messages for the specific selected product. After you're done with the changes, just click save and the message will be updated.
Related links
How to edit your Chatbot messages
How to customize my Chatbot messages